Coming home to a fresh, calm space after a long week feels good. It also takes less effort than you think. When you skip the small weekly resets, messes build up fast. Then you end up scrubbing harder, longer, and dealing with odors and extra germs.
A simple weekly cleaning routine keeps dirt from sticking around. It also helps your home smell better and feel more comfortable. Plus, it reduces that dusty, “why is the air so heavy?” feeling.
So what should you actually do each week? Focus on the rooms people use most, starting with the kitchen and bathroom. Then move through bedrooms and living areas for dust and sleep-friendly freshness. Finally, handle floors and a few hidden spots that collect grime.
If you want quick wins, aim for tasks that take under 30 minutes per area. You’ll finish faster than you expect, and you’ll feel the difference right away.
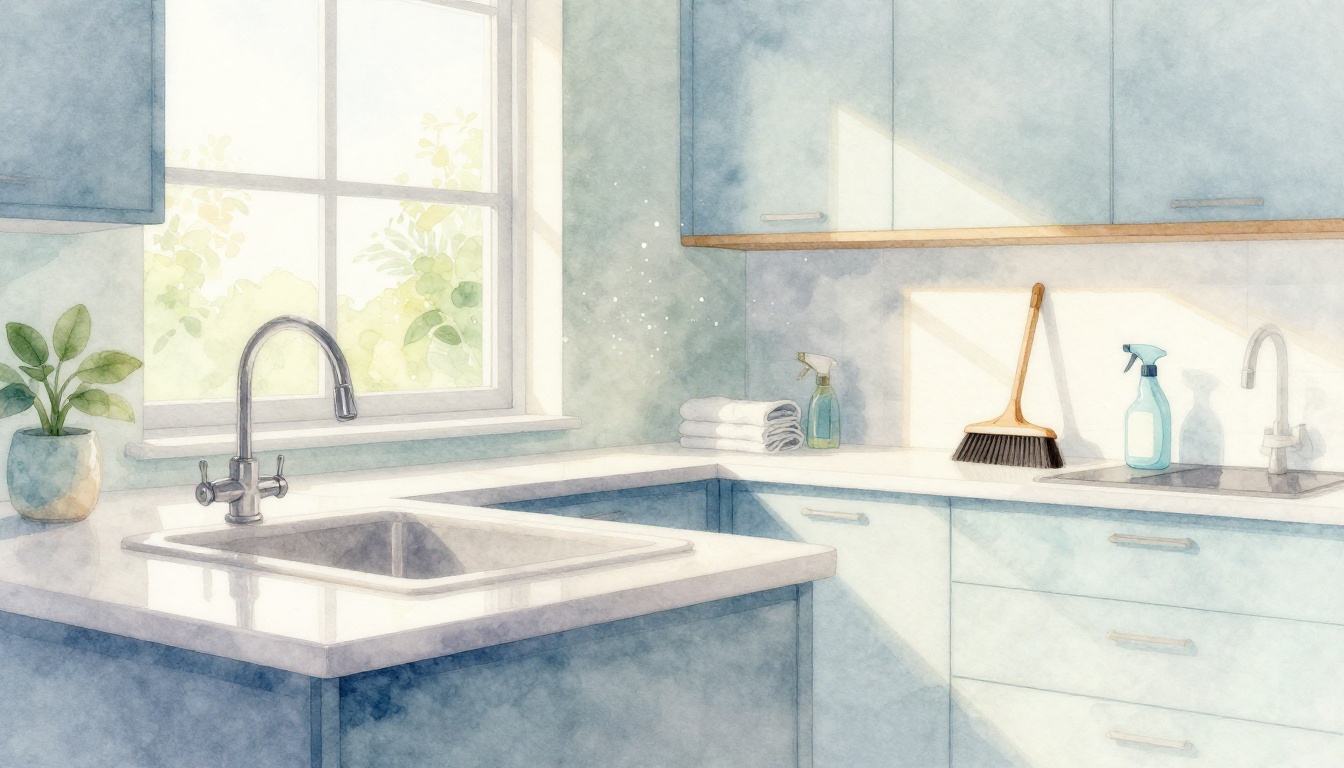
Kitchen Tasks That Stop Messes Before They Grow
Your kitchen gets hit from every angle. Grease from cooking, crumbs from snacks, and sticky spills from everyday life. Because of that, your weekly kitchen cleaning should focus on the high-traffic spots first. Do them consistently, and the mess stays light.
Start with a fast wipe-down of key surfaces. Then handle the “sticky culprits” like the sink and stovetop. After that, do a quick check inside the fridge so leftovers don’t turn into odors.
Experts recommend weekly resets that cover common trouble areas, not just what looks dirty. A helpful reference is everything you should clean every week, which breaks down small tasks that prevent buildup. You don’t need to deep-clean everything. You just need to keep the main hot spots under control.
Here’s an easy time target: 20 to 25 minutes for the core kitchen tasks. If you clean on a set day, you also avoid the “I’ll do it later” spiral.
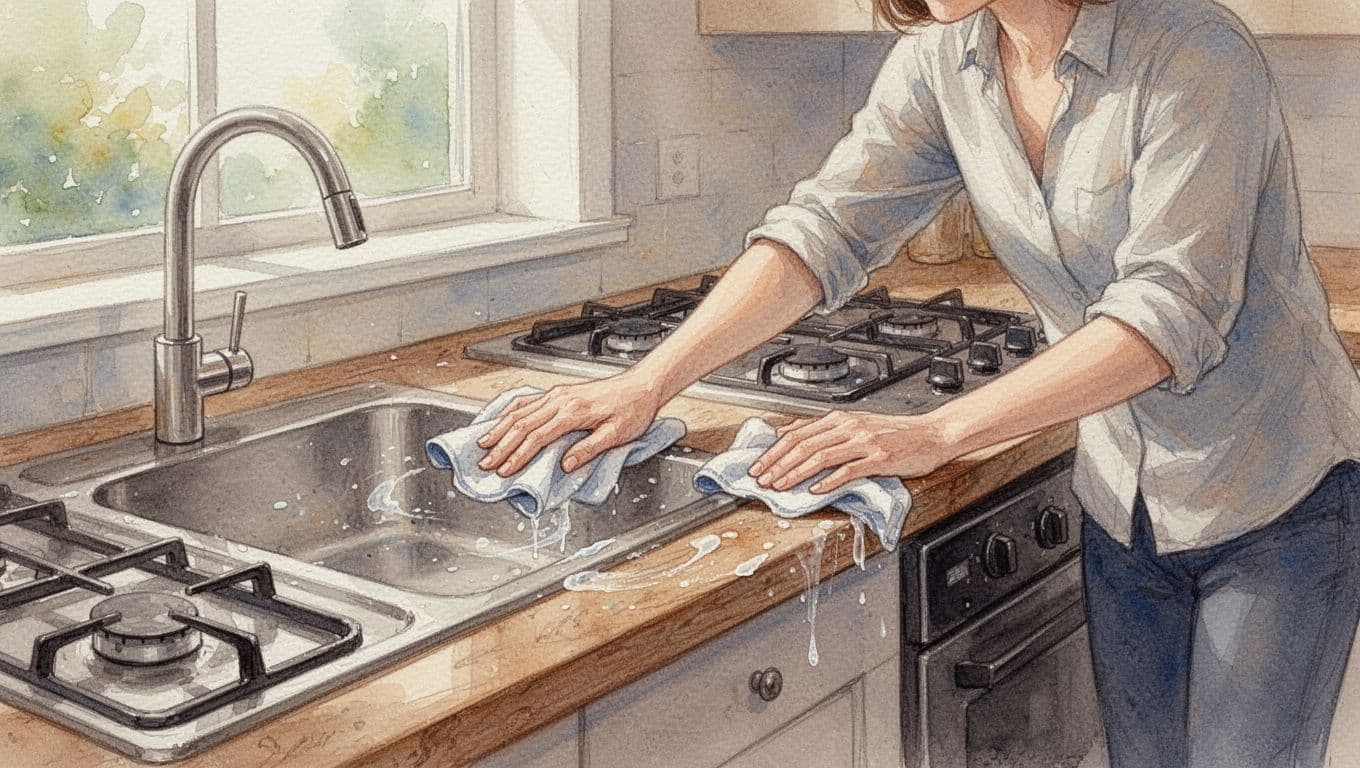
Quick Wipe-Down of Appliances and Surfaces
Think of this step as “stop the spill before it dries.” Once food splatter and grease set in, they cling. They also make food prep smell off.
Work in this order for speed:
- Wipe counters, including the spots where you set dishes and cut food.
- Clean the stovetop, especially around burners.
- Scrub the sink to remove stains and film.
- Wipe the microwave inside, even if it looks “mostly fine.”
Next, do a quick fridge sweep. Pull out expired items, then wipe any spills you spot. This one habit alone cuts down that sour smell that can sneak in.
You can also add the eco-friendly option for shine. A light vinegar spray on wipeable surfaces can help lift grime without harsh fumes. Just test first if you have sensitive finishes.
For a more item-by-item checklist, this guide on kitchen items you should clean weekly can help you spot overlooked areas. Use it as inspiration, not pressure.
Weekly kitchen cleaning isn’t about perfection. It’s about keeping the mess small, so you never need a huge cleanup on a random night.
Mop Floors and Empty Trash Bins
After surface cleaning, switch to floors and waste. Vacuuming first helps you avoid spreading crumbs while mopping.
Then mop with an appropriate cleaner for your floor type. If you use a vinegar-water mix, keep it gentle and test on a hidden spot first. Floors take the hit from foot traffic and cooking spills. That’s why weekly attention matters.
Also empty trash at the end of the week. This is a simple move, but it stops odors from building in the bin. If you compost, rinse bins when needed. It keeps the whole kitchen fresher.
If trash starts to smell, it’s not a “deep cleaning problem.” It’s a timing problem. Emptying weekly keeps the kitchen from drifting into that stale, greasy smell.
As you plan your week, group kitchen tasks together. For example, Thursday can cover fridge checks, wipe-downs, and mopping. Your future self will thank you.
Bathroom Cleaning to Fight Germs and Grime
Your bathroom collects moisture, soap residue, and everyday bacteria. Even when it looks clean, germs can linger in high-touch areas. Weekly bathroom cleaning keeps surfaces easier to wipe and reduces buildup that leads to tougher scrubbing later.
If you want to keep this section short and manageable, aim for about 15 minutes. That’s enough time to disinfect the key places and refresh the space.
This routine also supports better health. Fewer germs on shared surfaces can mean fewer sniffles for everyone. It also helps your bathroom feel cleaner, not just “less dirty.”
For a checklist you can follow, a bathroom cleaning checklist you’ll actually use gives a practical rhythm. Use it to confirm you’re covering the basics, then adjust to your home.
Disinfect High-Touch Spots Like the Toilet and Sink
The toilet gets the most attention, but the sink deserves real work too. Soap scum and water spots spread quickly. That means weekly disinfection should hit the places you touch most.
Do it like this:
- Scrub the toilet bowl with a toilet brush. Focus on the rim and inside edge.
- Wipe the exterior with a disinfectant cloth or spray.
- Clean the sink basin, faucet, and handles.
- Wipe counters and any nearby knobs or cabinet fronts.
Because the sink is where you wash hands, it’s high-contact. That’s also where grime likes to sit. Get into corners around the drain and edges.
If you prefer natural options, baking soda can help for light scrubbing. For disinfecting, stick to products made for bathrooms. Follow label directions, especially around bleach and ventilation.
Polish Mirrors and Refresh Towels
Mirrors make your bathroom feel “done” faster than anything else. Streaky glass makes a clean bathroom look neglected. So wipe mirrors weekly with glass cleaner or a vinegar-based cleaner.
Then refresh towels. If you share a bathroom, laundry matters. Wash towels at least weekly, especially if people use them daily. After all, damp fabric becomes a smell trap.
You can also handle a small detail that adds comfort. Put fresh towels within reach. Then replace the old ones before they get musty.
A quick reminder: don’t overthink the “perfect towel system.” Just keep it consistent. Weekly changes keep things sanitary, and the bathroom stays inviting.
Bedroom and Living Room Dust Busters for Cozy Vibes
Dust builds in bedrooms and living rooms because these areas are full of soft surfaces. Fabrics collect particles. Airflow moves dust around, so it settles on shelves, blinds, and tabletops.
Weekly attention helps your home feel better to breathe in. It also supports sleep. If your bed looks clean but dust lingers, it still feels off.
A good rhythm is about 20 minutes per room. You can do bedrooms one day and living areas another day.
You don’t need heavy chemicals for this part. A microfiber cloth and vacuum attachments do most of the work. Dusting the right surfaces weekly also cuts down allergens.
For ideas on sleep-friendly cleaning, this bedroom cleaning checklist focuses on comfort, air quality, and simple habits. Use it to guide your choices.

Fresh Bedding and Surface Dusting
Start with the bed. Strip the sheets, then remake the bed right away. Fresh bedding helps you relax. It also limits dust that gathers on fabric.
Next, dust surfaces people notice:
- nightstands
- headboards
- shelves near eye level
If you see dust bunnies under frames or on corners, tackle them too. However, keep it simple. Wipe what you can reach in a few minutes.
Then check for small clutter. A couple of cups, random mail, and an open drawer can make a room feel messy. Quick tidying takes less time than deep organizing.
If you share your home with pets, dusting gets even more important. Pet hair sticks to blankets and lands on hard surfaces too. Weekly attention prevents buildup.
Vacuum Upholstery and Rugs Thoroughly
Now handle the “invisible dirt.” Vacuuming carpets and rugs removes dust and loose debris. It also prevents dust from lifting when you walk.
Use attachments for edges and corners. Then vacuum under furniture if you can. If not, do what you can safely and quickly. Consistency beats perfection.
For couches and chairs, use a lint roller for pet hair if needed. It’s fast and helps right away. After that, vacuum upholstery with a brush attachment.
You can also wipe window sills and mirrors. This clears the cloudy film that collects over time. It makes the room feel brighter.
The bottom line: vacuuming weekly keeps dust from spreading. Then your home feels cleaner even before the next deep clean.
Floor Care and Whole-Home Quick Hits
Floors carry a lot of daily grime. Shoes bring in dust and grit. Cooking spills, bathroom moisture, and pet hair all land here too. That’s why weekly floor care matters more than people think.
If you want a whole-home reset, schedule one longer floor day plus a couple of small touch-ups. You can usually finish in under an hour, depending on home size.
Don’t forget stairs and hidden spots. Dust piles on edges, blinds, and closet clutter. Those spots make the whole place feel messy, even when most rooms look clean.
Pros often share that homeowners miss common cleaning areas. For inspiration, the weekly cleaning spots pros say most people miss highlights those “why does this always look dirty?” zones.
Vacuum and Mop Every Floor Type
Use a simple rule: vacuum first, mop last. Vacuum removes dry debris. Then mopping handles sticky residue and remaining dust.
For hard floors, choose a cleaner suited for your finish. If you mop with vinegar-water, keep it light and follow safe dilution. Never soak floors you shouldn’t. Especially with wood, excess moisture can cause damage.
Before using any cleaner, spot-test in a hidden corner. It keeps you from accidentally dulling finishes.
Also, clean the same way each week. When you repeat your steps, you move faster. You also waste less time fixing mistakes.
If you have rugs, don’t rush them. Rugs catch dust that never fully disappears. Vacuum slowly enough to pick up hair and grit.
Hit Stairs, Blinds, and Hidden Spots
Stairs gather dust from foot traffic. So vacuum them weekly, even if you don’t vacuum every step. Use the crevice tool or brush attachment to get into corners.
Next, dust blinds and window frames. Dust builds up on the top edges, then drops when you open windows. A quick wipe prevents that cycle.
Then do a short closet tidy. You don’t need to reorganize everything. Just pull out items left on the floor. Take a minute to align shoes and close open bins.
Finally, check for trash and recyclables. This is a “hidden spot” too, because it affects smell and clutter. Empty bins while you’re moving through the house.
Eco tip: microfiber cloths can reduce waste. They trap dust and grime, so you use fewer disposable wipes.
A weekly floor reset also reduces allergens. When you remove the dust regularly, you stop the constant buildup that triggers sneezing and itching.
Build a Weekly Schedule That Actually Sticks
Most people don’t fail at cleaning because they’re lazy. They fail because the plan is too big. A giant list turns into overwhelm. Then the whole week breaks down.
Instead, assign tasks to specific days. Then you only focus on one zone at a time. This also helps you avoid repeating work.
Try this simple schedule as your starting point:
| Day | Main area | Weekly task focus |
|---|---|---|
| Monday | Living room | Vacuum rugs and upholstery, dust surfaces |
| Tuesday | Bedrooms | Change sheets, dust nightstands, vacuum floors |
| Wednesday | Quick kitchen check | Toss expired items, wipe visible counters |
| Thursday | Kitchen reset | Stovetop, sink, microwave, mop floors, empty trash |
| Friday | Whole-home touch-ups | Stairs, blinds, quick closet tidy, final floor pass |
You can shift days around. The point is the rhythm. Also, post the plan where you’ll see it, like the fridge door or a shared note.
When you involve other people, keep it fair and simple. One person can dust shelves while another empties trash. Then you finish faster without arguing.
Finally, start small if you’re behind. Pick just one room for the first week. Once it feels easy, add the next zone.
A clean home isn’t built in one weekend. It’s built through steady weekly wins.
Conclusion
Weekly cleaning gets easier when you clean by room and stick to short sessions. Focus on the kitchen and bathroom first, then handle bedrooms and living spaces. After that, protect your time with weekly floor care and small hidden spot checks.
If your week feels chaotic, return to one rule: vacuum first, wipe key surfaces, empty trash, and refresh bedding. That combo keeps mess small and the home feeling good.
Pick one room today. Do the weekly reset in 20 minutes. Then tell yourself the same thing you felt the first time you came home to a fresh space. Wouldn’t it be nice if every weekend started like that?